Halloween will be here before we know it. Time to get those spooky decorations out or make your own! My mom and I made this family of friendly ghosts (to replicate my husband, myself and our two little ones), in one afternoon, back in 2012. This is a no-sew project…hooray!
I know how everyone loves those.
I am sharing how we did it today as part of my {a look back} series. We made these right after my son Owen was born, when I wasn’t doing much blogging. I love giving you “a look back” at these projects now and hope that you enjoy them as well.
I have actually never been a big decorator for Halloween. The colors and theme don’t really suit my style. But ever since having children, I have found myself feeling a bit nostalgic for the holiday where we love collecting all of those cavity causing treats. I prefer to keep the Halloween decorations to a minimum with a vignette here and there, and obviously, kid friendly…
so nothing scary.
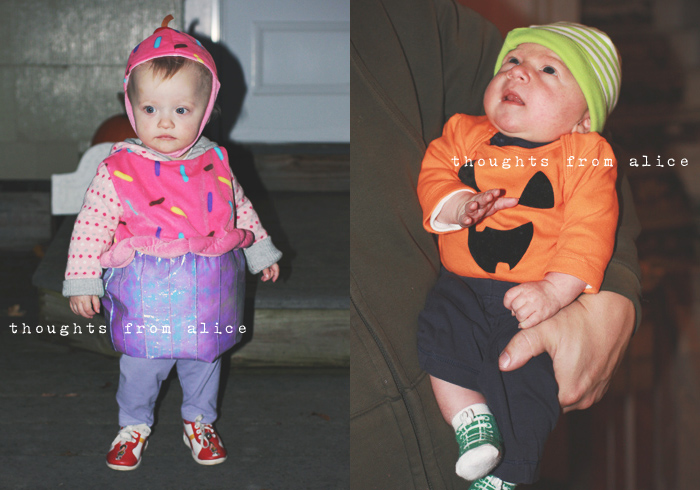
My mom and I made these “friendly” ghosts together when Hazel was a toddler and Owen was a newborn (he was under a month old at the time). Here they were ready for Halloween that year! A scrumptious cupcake and wee little pumpkin…
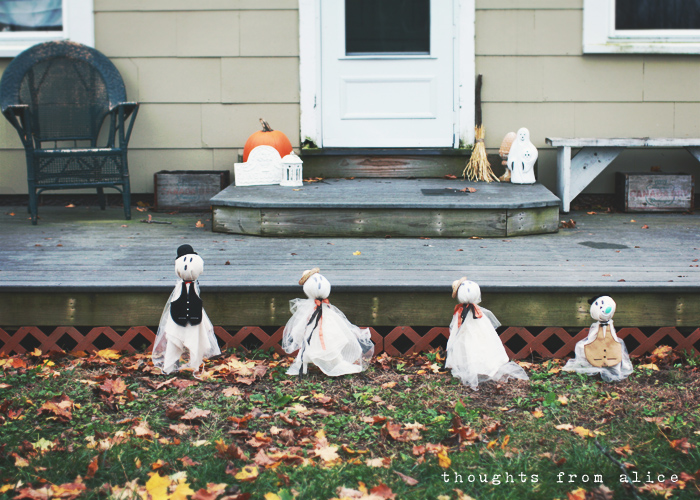
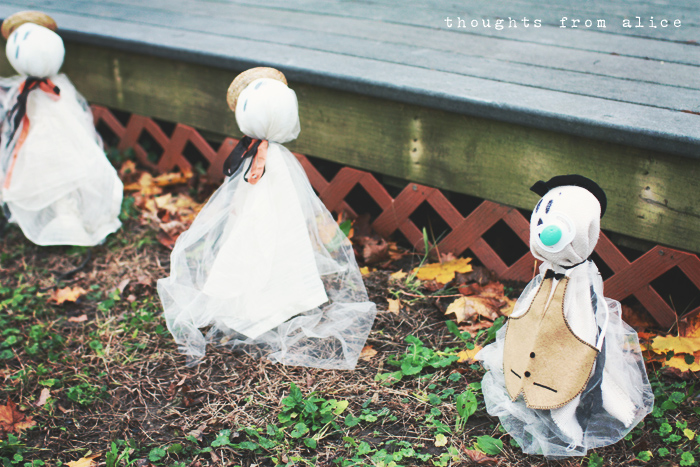
I wanted these ghosts to be displayed in the yard that year, so we propped them on sticks in the ground. I didn’t take process photos back then, but I will do my best to explain, step by step, how they were made.
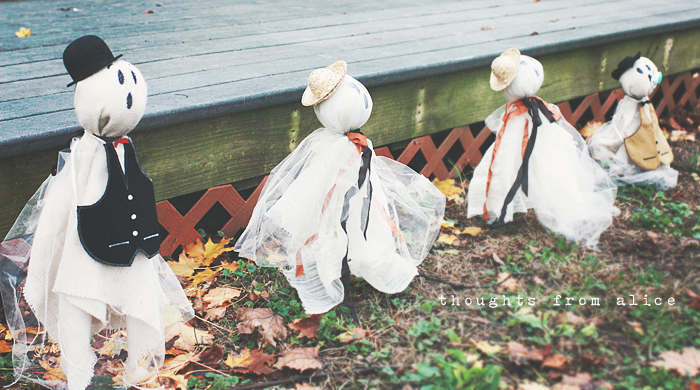
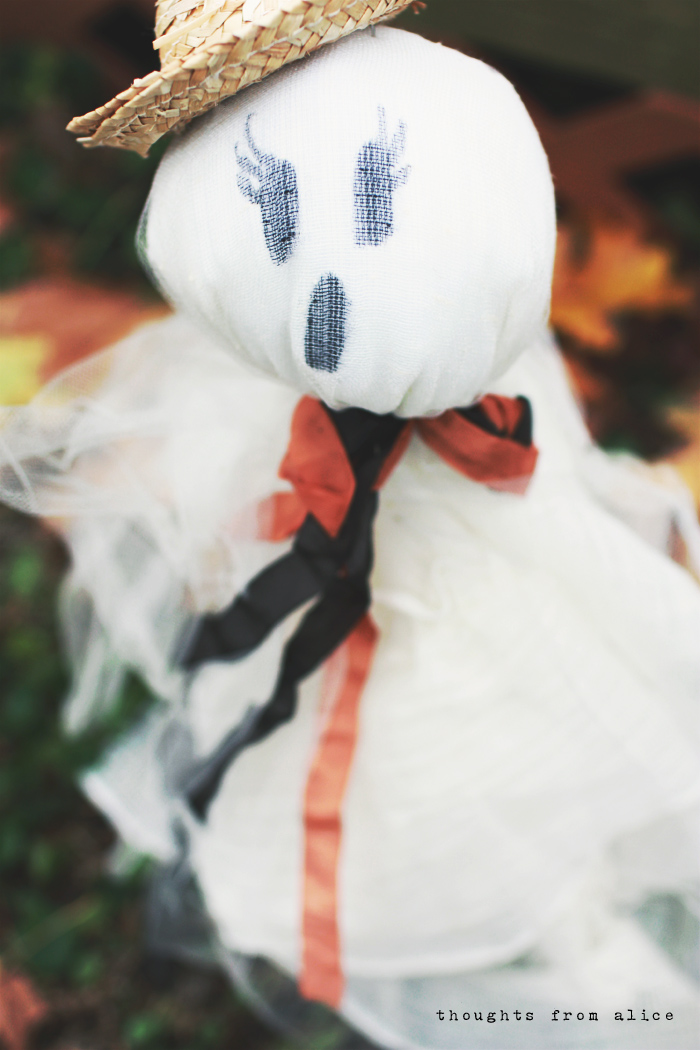
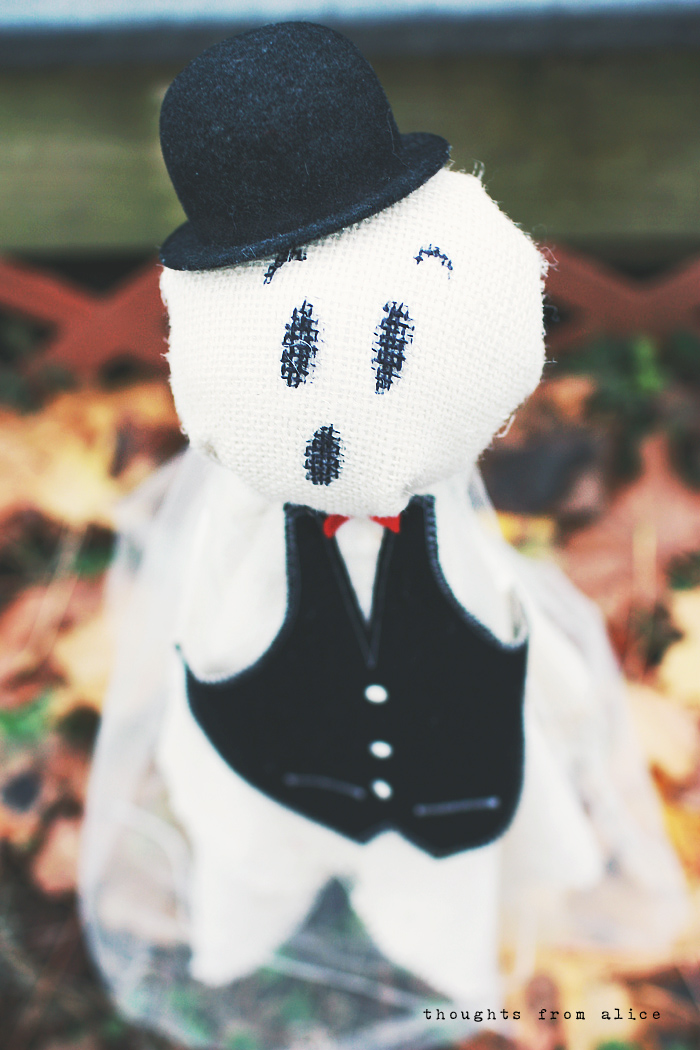
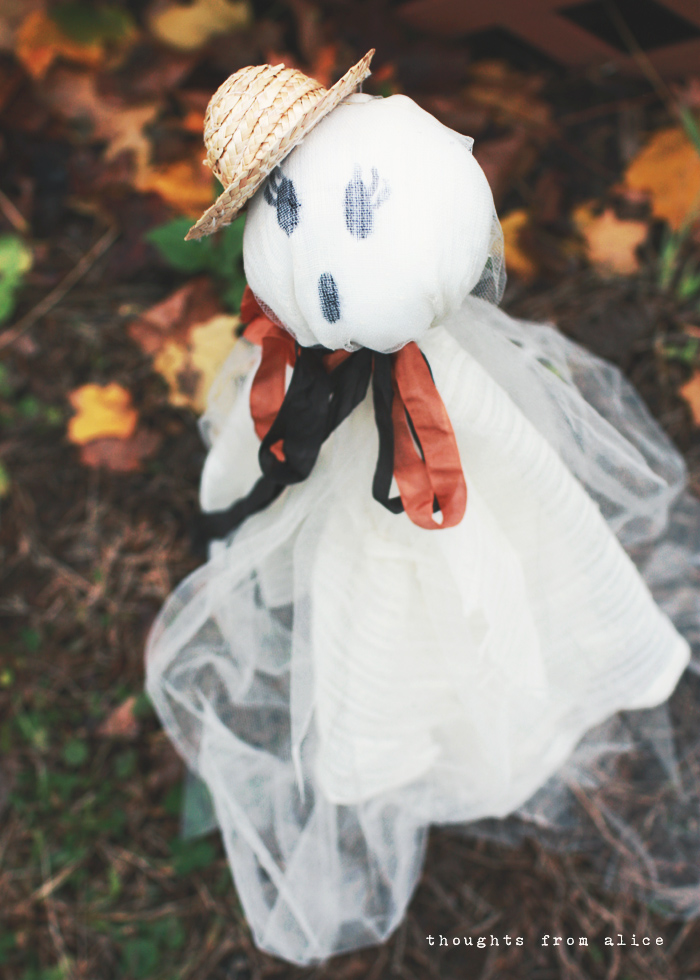
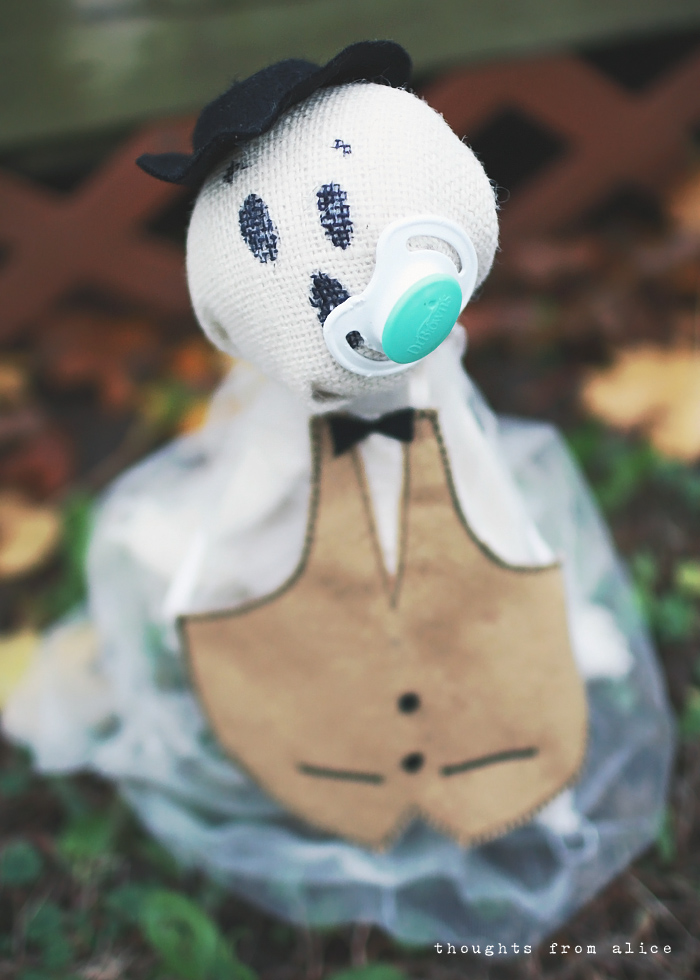
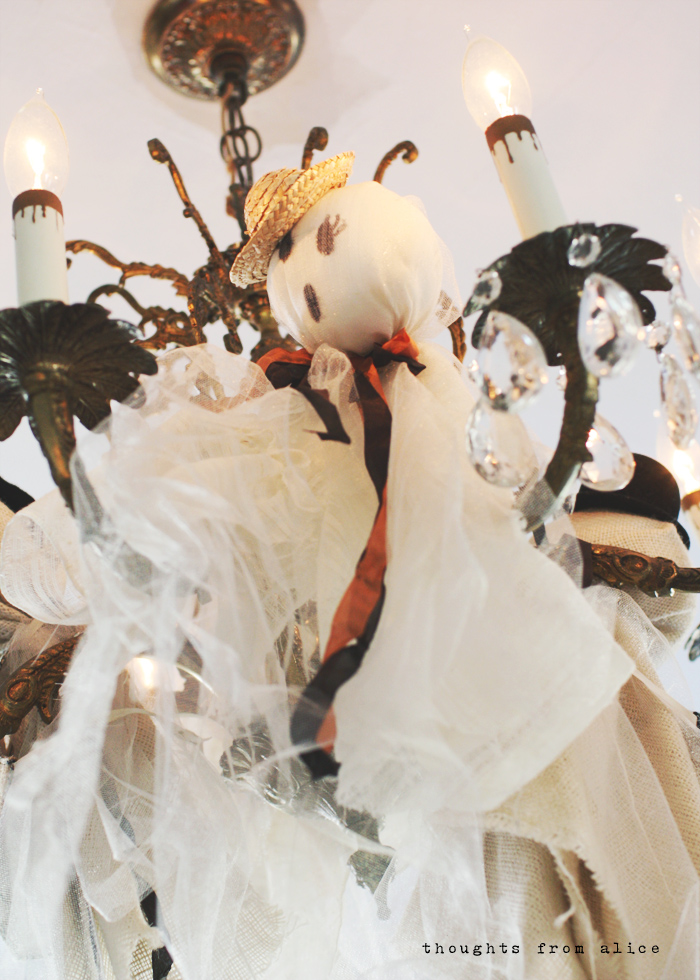
They really are very simple! All you need are some white or off white fabric scraps. I used white burlap, tulle and sheer vintage curtains. The fabrics were cut and frayed haphazardly to give a tattered look.
To make the girl bodies, I started with torn curtains with a layer of tulle on top. The boy ghosts were made of burlap with tulle on the underside.
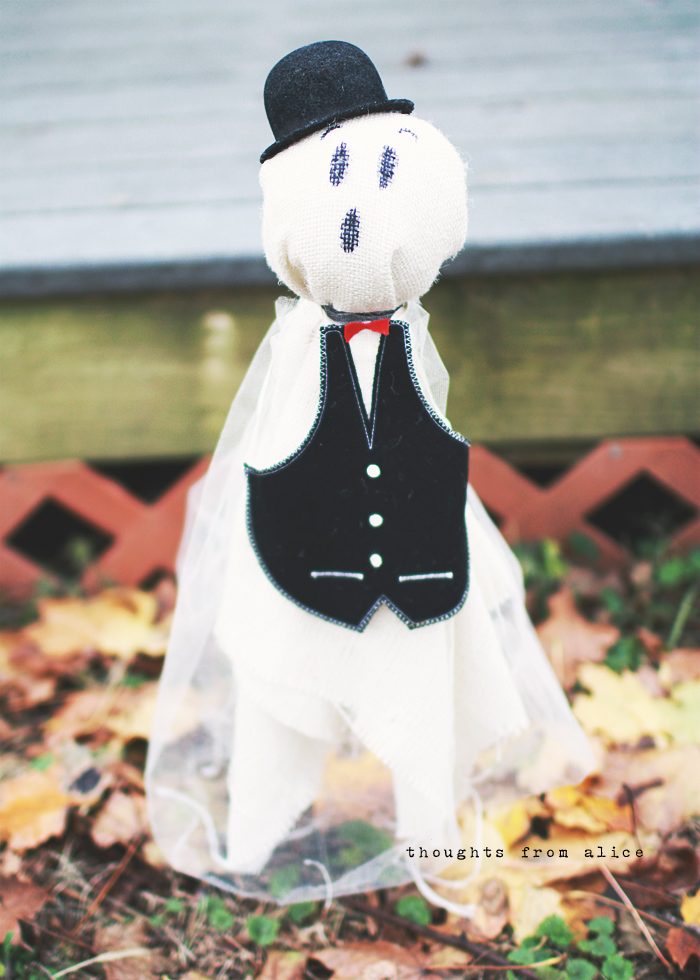
You can start by laying out your fabric scraps, in a rough square shape, on a flat surface. Place the tulle on top or bottom for your preference, then gather them in the center to form the head. Fill the head area with polyester fiber fill and tie around the outside to keep the shape. I used seam binding ribbon in dark orange and black to tie in long bows.
I drew simple faces on mine with a black Sharpie marker. If you are going to put sheer fabric or tulle on top, you might want to draw the faces first. Or you could easily glue black fabric scraps or felt in the shapes of the mouth, eyes and eyebrows if you preferred.
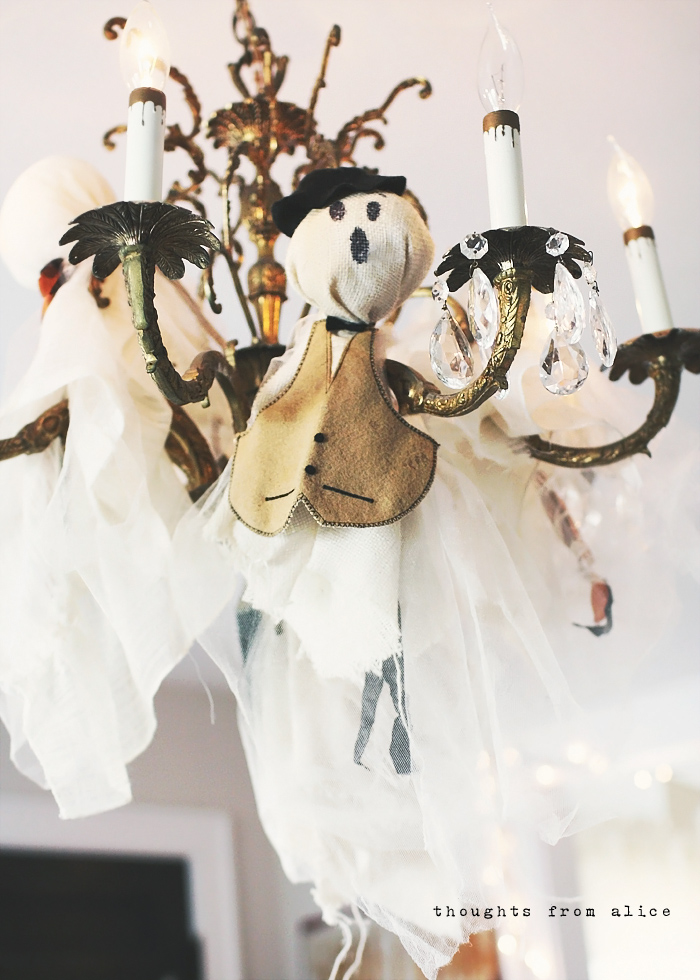
We embellished them with some doll clothes and accessories that my mom had in her crafting stash, including a two small top hats, straw hats, and two felt vests. These can likely be found in a craft store in the doll making section. For the vests, you could also cut them out of fabric or felt. We decided to glue a pacifier on to the littlest one to be the “baby” of the family.
We found really sturdy sticks in the yard and put them through the inside deep into the fiber filling, then stuck them in the ground the day before Halloween to greet visitors when they came trick-or-treating. You could also use wooden dowels to make it easier.
They do look pretty dapper don’t they?
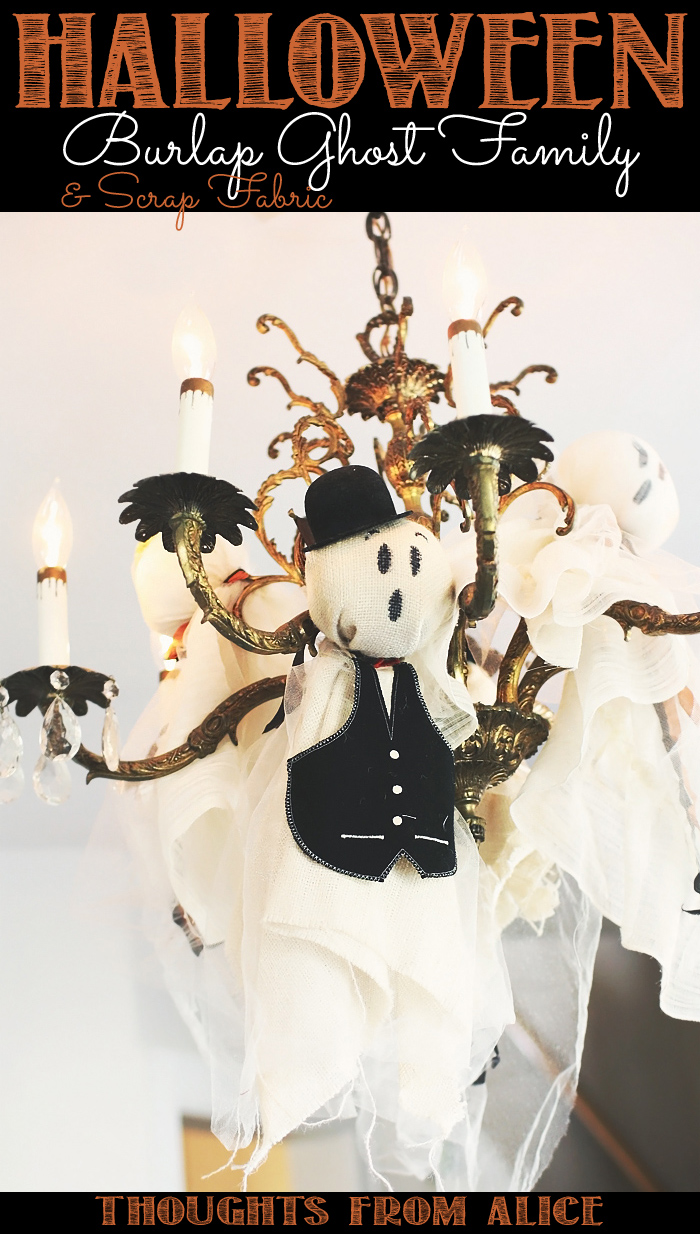
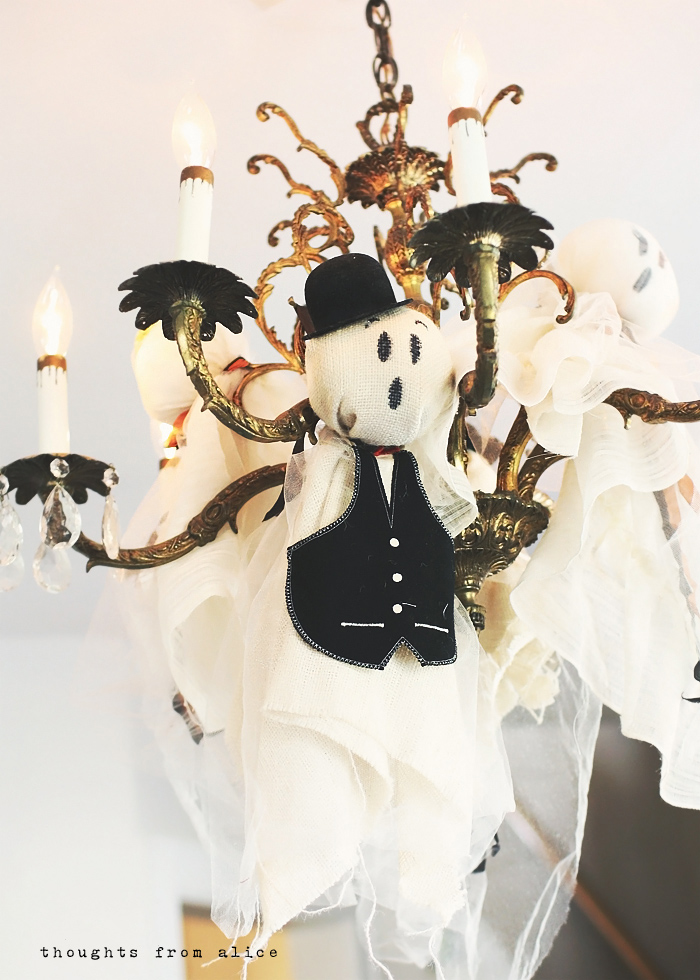
The following year, I decided to keep them indoors so we could decorate with them longer (I didn’t want to leave them outside in inclement weather). Instead, I hung them from our living room chandelier to greet everyone when they came in.
We were a house of two toddlers that year, so I took the pacifier off of the little one…
I might hang them here again this year, but who knows, maybe my kids will tell me where they want them to go! That’s the fun part of kid’s getting older: they can help you decorate.
I love letting mine be a part of even the smallest details. It’s all part of making this little a house of ours, a home.
If you are in the mood for some more looking back with me, I am sharing my
Vintage Inspired Halloween Mantel from 2012 over on Jennifer Rizzo’s blog today! Head over to see how I created an “abandoned mansion” style vignette that year…
Till next time…
~Alice W.

What cute ghosts! The one with the binkey made me smile. Just love coming here and seeing all the inspiration!
ReplyDeleteThank you so much Sheila!
DeleteSo cute, Alice! They definitely look dapper! 🙂
ReplyDeleteThanks Jennifer!
DeleteThose are really cute, Alice. I really love your little cupcake and pumpkin. They grow up way too fast, don't they? xo Diana
ReplyDeleteAlice, so cute–love your friendly display and that mantel! Blessings, Cecilia
ReplyDeleteThese are so cute, Alice! I love the little top hats! -Amy
ReplyDeleteYour ghost family is so cute! I really like the one with the black vest!
ReplyDeleteNavy Wifey Peters @ The Submarine Sunday Link Party
http://www.usscrafty.com/2014/09/submarine-sunday-103.html